Good morning darlings! I’m so excited for this morning’s post. We’re doing a new, fun photo series this month. Kara from the pretty blog Photo Journey has kindly agreed to share some of the photo tips she learned while teaching herself about her camera. Her images are so lovely – they give me hope that I’ll be able to eventually figure out my own camera!
Kara will be back every week for the next month and I’m so excited about her tips for us! Thanks Kara!
Hello From China Village Readers! I’m so excited to be a guest this month and be among Emily’s lovely posts.
A little about me: I live in Texas; I’m passionate about photography; I started my Photo Journey in 2009 to learn more about my camera, my style, and photography; I love taking pictures and I’m happy to share tips along the way.

One valuable tip I learned and continue to practice is, when you find a subject to photograph, never be satisfied with the first image. The key is to move around your subject and to capture it at every possible angle. This will help push your creativity and it’s sure to help you create some great images.
A few ways to move around a subject:
* Straight On
* From the Left/Right
* From Behind
* Up High/Down Below
* Up Close/Far Away
I took the following simple images purely to demonstrate how moving around your subject can create very different images. I’m not saying one is better than the other, but the variety of angles allowed me to create more interesting images.
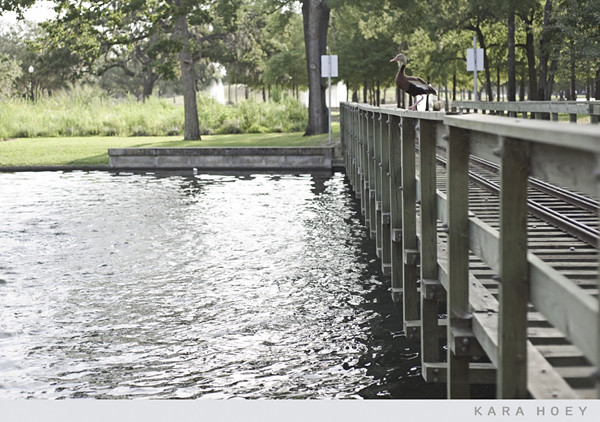
Walking through the park this weekend I spotted this sweet duck on a bridge and he agreed to be our subject for this photo tip. Let’s call him Bob.
Straight On
This is where I spotted Bob – hanging out on the bridge. I took this image across the water with a short 50mm lens. Not a bad image, but I was thinking that Bob is way too small here.
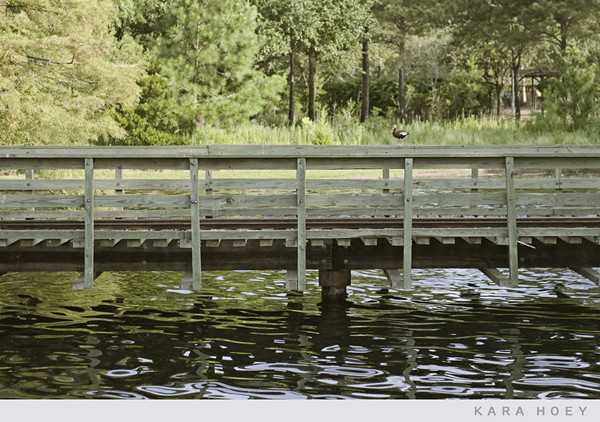
Adjustment: Move to the Left, Straight On
I was able to move around to the left side of Bob here, easing my way closer. In this image I can see more of Bob’s coloring and he’s much larger in my frame. I’m still eye-level with Bob, but the angle and close proximity has helped to change the image.
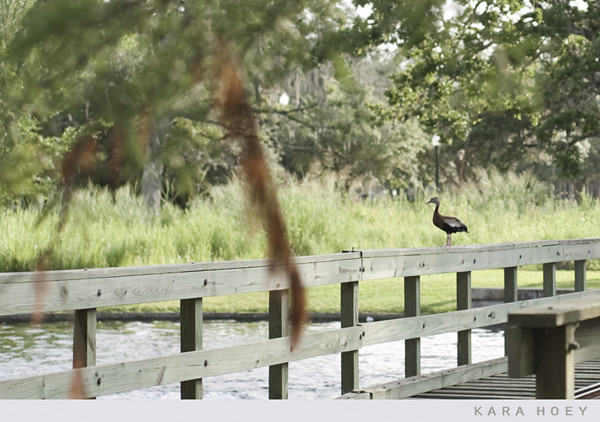
Adjustment: Get Low
On the other side of the bridge was a small, grassy slope where I was able to get lower and capture some of the trees in the background. If I’d decided to get into the water (no way) I might have been able to get those two park signs out of the shot that I wasn’t crazy about. By the way, are you noticing that Bob is still in the same spot in each image, but each image looks different?

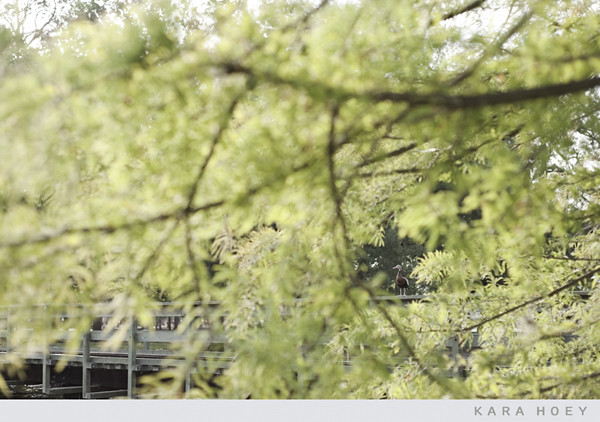
Adjustment: Get Behind
Have you noticed how Bob keeps moving with each of my angles? At this point I tried to get on the other side of him, but he managed to pose for the camera. In the image below I’ve moved as far as possible in the opposite direction to where I took my first image. This massive tree managed to block my view of the bridge, but I found a nice little open spot in which to frame Bob.
Adjustment: Get Higher or Above the Image
This image looks similar to image number three, but you’ll notice that you can see Bob’s feet now since I am up a bit higher (on a concrete barrier). I’m also able to capture more of the water and less sky.
So there you have it, just a simple tip on how moving around your subject can change your images. It will require you to take more time and get off the path, but it’s fun and well worth the adventure.
Hope this helps you and encourages you to go capture some great images!
2 Comments
[…] readers! Kara is joining us every Tuesday this month to share her fabulous photo tips. Here’s last week’s! Thanks, […]
[…] check out Tip #1 and Tip #2 if you missed them the last few weeks! Thanks, […]