Happy Tuesday, darlings! Thank you so much for all your nice comments about my sea glass art yesterday! I’m so glad you loved it as much as I do!
We’re back with another fabulous photo tip from Kara today! I love this tip because it is so helpful in taking food photographs (I struggle with mine!). And after reading Kara’s tip this week, I finally dragged out my camera manual and started reading it. I am determined to master my camera like she has!
And check out Tip #1 and Tip #2 if you missed them the last few weeks! Thanks, Kara!
Hello From China Village Readers! I hope you enjoyed last week’s tip on using sunlight to create the best image.
This week I want to show you how cameras interpret Indoor Lighting and how an artificial light source can alter the color of your images. You’ll be surprised by the examples I show below!

Whether it’s a birthday party, pet, or a gorgeous dish, there are many reasons I find myself taking photographs indoors. Usually there’s little control over the light source we use indoors – we’re limited to lamps, overhead lights, or window light if we’re lucky. Have you ever noticed how some indoor images can look yellow or blue? Maybe you’ve never noticed. I know that I didn’t realize this until I learned about White Balance. Before we dig into the details of White Balance, let’s take a look at one image taken under different indoor lighting scenarios. I put together a little snack prop for us (please excuse my lack of food styling skills). In each scenario below, I let my camera decide the appropriate white balance (or color temperature) by setting my camera to Auto White Balance. Please note that all computer screens and internet browsers are different so the color on your monitor may differ slightly from my descriptions below.
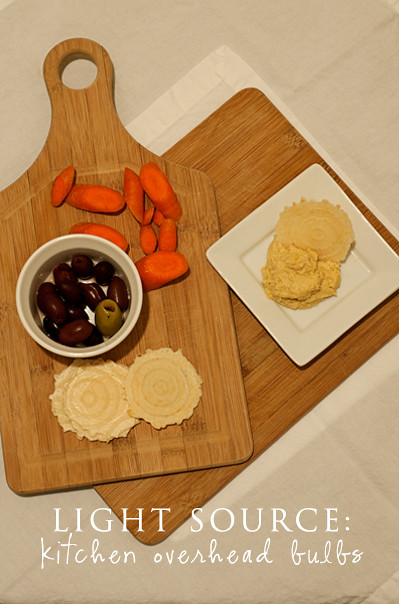
When my hubby and I make nice meals at home, I love taking pictures of our food prep and the final dishes – so I always find myself in our apartment kitchen (with no windows) under unflattering incandescent bulbs. Let’s start there. With my camera set to Auto White Balance, here is the image that I captured. You’ll notice very quickly that the image has a yellow and green tone that makes these appetizers look unappealing – not really what I’m going for with a food image. The overhead lighting has turned my dishes and napkins from white to dingy. I must admit that it’s a bit embarrassing to show this image!
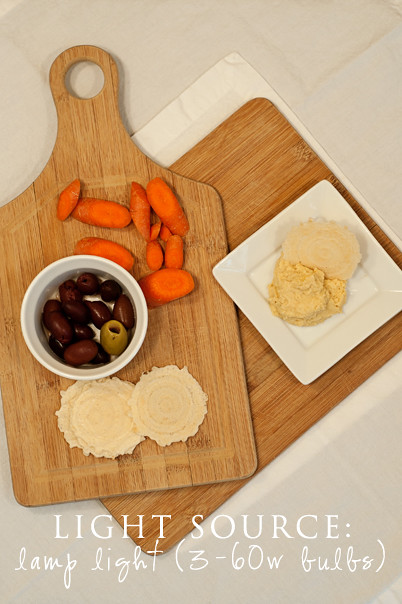
Let’s move on to my living room where I have a large lamp with three 60 watt bulbs. This lamp offers a lot of light if I need it. With my camera set to Auto White Balance, there’s definitely some yellowing of the image. My food is still looking a bit unappealing.
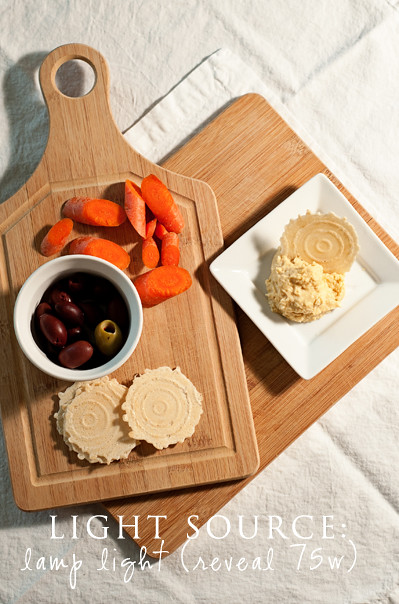
Next up, I found these new Reveal light bulbs that are supposed to mimic more natural light instead of the yellow or warm light from regular light bulbs. In the image below I used one small lamp with a 75 watt light bulb. I’m way more impressed with this bulb compared to the cheap bulbs in the previous images – and yes the Reveal bulbs are more expensive. With just a few more of these bulbs I could remove some of the shadows from the olives and around the left side of the image. I think my food is looking a bit better here and if I had no other light source I could definitely work with this image! My camera has done a good job capturing more accurate color here.
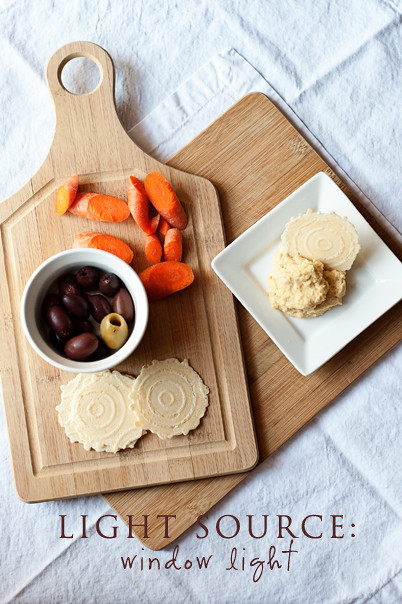
My favorite place to photograph in my apartment, however, is right up close to my windows. There are only two decent windows where I can pull up props between 11-3 and get some great light. I had just missed the best light of the day to take the image below, but I was pleased with the capture. If you notice, with my camera set to Auto White Balance, the napkins have a slight blue tint or cooler temperature – this was due to light being mostly from the shady area outside the window. I’m thinking this image looks good enough to take a few bites.
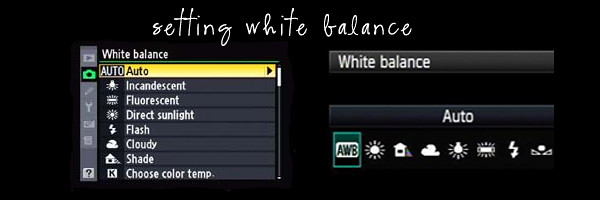
I hope you go back the top of this post and take one last look over the differences in the images. I’ve taken the same image, using the same camera and post processing (contrast and sharpening) but the light source has done some damage to these images. Because I used the Auto White Balance setting on my camera, my camera had no idea that the light source that I was using had a different color temperature. Light bulbs are warmer and cast a yellow glow, light from the shade outside or on a cloudy day is cooler and can cast a blue tint to images. Thankfully we can tell our cameras what light source we’re using so that the adjustments can be made before taking the picture. Here are two examples of camera menus where you can adjust the White Balance. Once the adjustments are made, the camera will make it’s own best adjustment to find the correct color for your images.
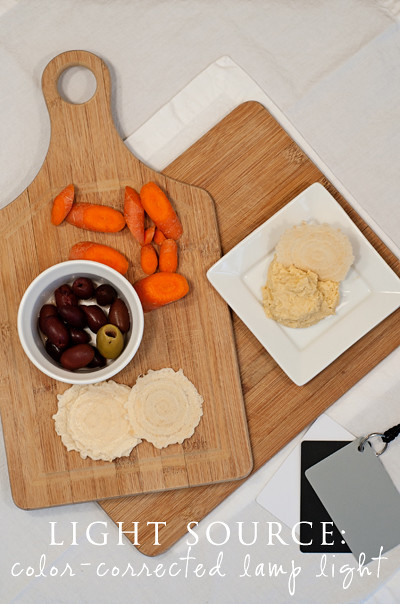
If you don’t like poking through menus or turning dials and you have a photo-editing software program, then I would highly recommend buying a gray card (mine is shown in the image below). By using a gray card in one of my images, I can tell my software program (e.g. Lightroom) that my gray card is 18% gray and that it should adjust the color of all remaining images based on that.
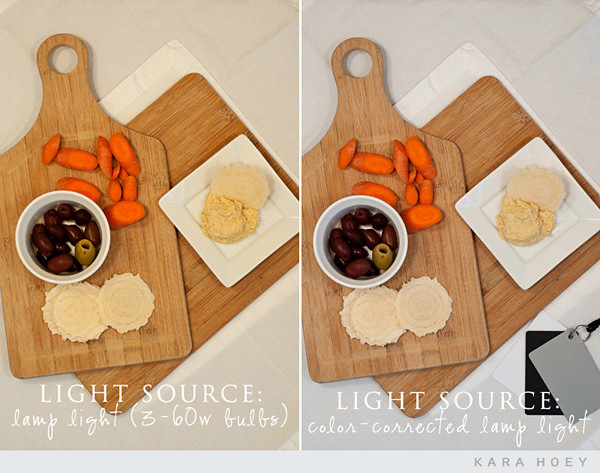
Here’s a side-by-side comparison of the image taken with the lamp light. The image on the left and right were taken using Auto White Balance. In the image on the right, I’ve included my gray card and told my software program to adjust the color. You end up with the color-corrected image on the right. I can use the same setting to adjust my image on the left so that the color is more accurate.
There’s so much more to learn about White Balance, so if you’re interested in learning more, pull out your camera manual or search for your camera settings online. I highly recommend learning how to adjust White Balance – especially if you use artificial lighting – your images will look more natural and hopefully appetizing!

3 Comments
oh brilliant. I will study this in detail!!
This post is so useful. Obviously, I photograph a lot of the food indoors, and lately I’ve been so frustrated by the complete lack of natural light in the kitchen. Thank goodness for being able to color correct things on Photoshop. It’s not quite the same, but this tutorial definitely helps.
[…] Contact ← Kara’s Photo Tips: Indoor Lighting […]